DISCLOSURE: This post contains affiliate links. If you purchase through our links we may earn a small commission at no extra cost to you.
Related Removal Guides
- Laser Comparison: Compare pulse mechanisms in our PicoWay vs PicoSure vs Q-Switch Guide.
- Budget & Estimations: Calculate total sessions with our Tattoo Removal Cost Calculator.
- Post-Laser Healing: Read what to expect in our Laser Tattoo Removal Blister Care Guide.
HOW MACROPHAGES CLEAR SHATTERED INK PARTICLES
Tattoo ink is permanent because the particles are too large for your immune cells to move. When ink is deposited into the dermis, macrophages engulf the particles and then sit there, unable to transport anything that big to the lymph nodes. When one dies, a fresh macrophage swallows the same particle — a relay that keeps your tattoo visible for decades. A Q-switched or picosecond laser fires a pulse measured in nanoseconds or trillionths of a second, which is faster than the ink can dissipate heat. The particle expands violently and fractures into fragments a fraction of its original size. Those fragments are now small enough for macrophages to actually carry. Over the following six to eight weeks, they haul the debris through the lymphatic vessels to the nearest lymph nodes, where it's filtered out. This is why sessions are spaced so far apart and why the fade continues long after the redness settles — the visible change you see at week six is your immune system finishing work the laser started on day one. Think of it as smashing a boulder that's too heavy to lift, then carrying it away one pocketful at a time.
"The first three sessions typically deliver 50 to 60 percent of your total fading, and the remaining five to nine sessions fight for what's left."
Exactly What To Do, Day by Day
IMMEDIATELY AFTER SESSION 1: FROSTING AND SWELLING
The tattoo turns chalk-white within seconds of the pulse — that's frosting, gas escaping from the shattered ink, and it's the clearest sign the laser hit its target. It feels like hot bacon grease flicked onto sunburn, and the area swells and reddens within minutes. White frosting fading over 20 to 30 minutes into a raised red welt is normal; deep grey-black blistering across the whole piece or skin that splits open is not. Keep it dry and covered for 24 hours and apply a cool pack over the dressing. Don't pick the blisters that form over the next two days — that's how you turn a clean removal into a scar.
DAY 3-14 AFTER SESSION 1: SCABBING AND FALSE HOPE
The tattoo looks darker and angrier than before you started, with pinpoint scabs across the heaviest ink and a shiny, tight surface. It itches deeply and feels bruised to press on. Scabbing, itching, and temporary darkening are normal here; spreading redness beyond the treated area, yellow discharge, or a warm throb that worsens after day four is not. Moisturise with a plain unscented ointment and keep it out of the sun completely. Don't judge your results yet — this is the stage where people panic and book a consultation somewhere else.
WEEK 6-8 AFTER SESSION 1: THE FIRST REAL BEFORE-AND-AFTER
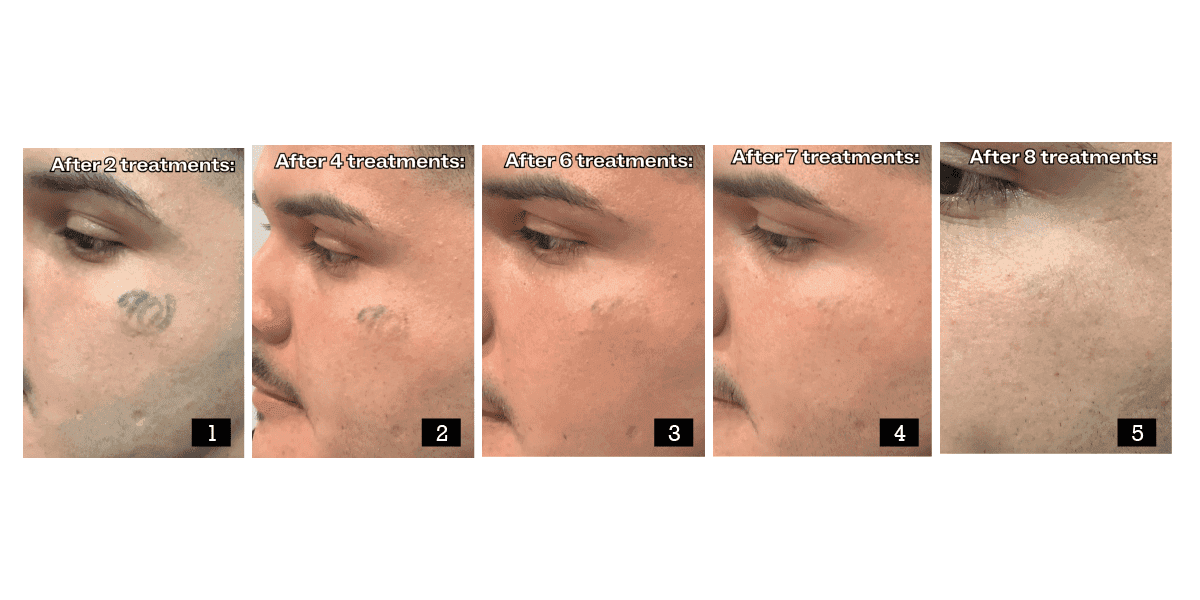
Now you see the actual change. Black lines look thinner and slightly grey, solid fill has gone patchy like a photocopy running out of toner, and the edges have started to blur. This is the point to photograph in the same light and same angle you used before session one, because memory is a terrible measuring tool. Take the photo, compare it honestly, and book session two. Don't compare against someone else's timeline — a 15-year-old faded tattoo will look dramatically better here than a six-month-old professional piece.
SESSION 2-3: THE STEEP PART OF THE CURVE
Each session now produces obvious, satisfying change — the tattoo goes from readable image to soft grey suggestion. It hurts marginally less because there's less ink absorbing energy, though the skin can feel leathery and slightly thickened between sessions. Continued fading with even lightening is normal; a section that goes completely dark and stays that way, or a raised firm ridge along old linework, is not. Keep the 8-to-12-week gap even if you're impatient, because clearance is immune-driven and can't be rushed. Don't let anyone talk you into a four-week interval — you'll get more inflammation and no extra fading.
What To Never Use
Sun exposure on the treated area between sessions
UV drives melanin production, and a tanned target area forces the clinic to drop laser energy, which means weaker sessions and more of them
Picking scabs or draining blisters
this removes the healing epidermis before it's rebuilt and converts a normal inflammatory response into permanent textural scarring, which then traps remaining ink beyond lymphatic reach
Smoking through the treatment course
nicotine constricts peripheral blood vessels and reduces macrophage delivery to the treatment site, which measurably slows ink clearance and adds sessions to your total
Anti-inflammatory painkillers like ibuprofen in the days after a session
inflammation is the mechanism that recruits macrophages to clear fragmented ink, and suppressing it works directly against the clearance you paid for
Booking sessions closer than eight weeks apart
the fade happens during immune clearance, not during the laser pass, so early re-treatment adds trauma and cost without adding results